Showing posts with label cartoon. Show all posts

Monday, September 28, 2015

Little Crazi and the Tooth Fairy + process

I've spent the last month trying to figure out Photoshop and Illustrator. I've got to say that drawing in Photoshop is a very pleasant experience, mostly. My biggest "come-the-f**k-on!" is the fact that you can not easily and in an natural manner change the size of the eraser when using a Wacom tablets eraser at the top of the stylus. When using a brush with the tip of my stylus I press an Express Key configured to CTRL+ALT plus a stylus button configured as a right click and then I drag the stylus right/left to decrease/increase the brush size. Doing this maneuver while the pen is flipped still resizes the standard brush, not the eraser, and it seems like there is no other way to do this. The only way I've managed to resize the eraser is to:

  1. Flip the stylus back to its tip
  2. Select the eraser tool
  3. Resize the eraser
  4. Select brush again
  5. Flip the stylus back to the eraser.

This. Is. A. Hassle.

More on the PS/Illustrator experience in a later post. Yesterday I finished my first drawing in Photoshop. I realized when I was done that this piece was probably more than a little bit inspired by the I Hate Fairyland comic by Skottie Young. Well, this is the result:

Little Crazy and the Tooth Fairy
Little Crazy and the Tooth Fairy (click to enlarge)

 The process

Below is a animation of the process of drawing this picture. In general, it goes as follows:

  1. Define a clear easily readable silhouette.
  2. Sketch rough on new layer.
  3. Iterate the sketch for more details and clean up as you go until happy.
  4. Ink up the line art on new layer.
  5. Select the new silhouette (magic wand outside ink, invert selection shrink selection by 2 px).
  6. Fill the character silhouette with black on new layer below ink.
  7. Lock transparency and apply base colors.
  8. On new multiply layer between ink and color: apply shade. Don't use black/gray, pick a color, this makes it more alive. I also used a layer mask here to make it easier for myself.
  9. Apply a darker and more saturated tone of same color to create heavier shades where needed. 
  10. Add highlights where needed on a new screen layer above the shades.
  11. Apply squashed fairy.
  12. Add balloon, text, background and other decorations as you see fit.
  13. Sign the thing.


Little Crazy and the Tooth Fairy, Process
Little Crazy and the Tooth Fairy, Process.

That's it for now.
10-4 //Niklas Häggström


Wednesday, July 15, 2015

Doggie Doodle

Tonight I was doodling around in Krita on my Wacom Cintiq Companion 2 and ended up with a rather cool doggie, if I may say so myself.

Doggie Doodle
10-4 //Niklas

Sunday, June 14, 2015

The Mighty Restroom Wizard Cartoon

Yeah, I sort of had it. Period. I had to do what every self respecting swede would have done in my position: I clenched my fist really hard in the pocket and wrote a note. B-\
This particular note i did in Krita using my Cintiq Companion 2 from Wacom. Below the cartoon is available as PDF in both Swedish and English.

There you go! Feel free to print it and put it up on the wall of your office restroom, just please, don't modify it.

10-4 //Niklas

Monday, May 4, 2015

Poison Ivy

Next in the DC-line for drawing is Poison Ivy. She'll now join Batman, Robin, Catwoman, Two-Face and Joker in the hall of sweetness.

Poison Ivy
10-4 //Niklas

Friday, May 1, 2015

Robin Revisited

Yesterday I gave Batman a haul-over. Today, Robin was up for redrawing. In the same series I've also drawn Two-Face, Joker and Catwoman.

Robin

10-4 //Niklas

Thursday, April 30, 2015

Batman Revisited

After doing Batman & Robin, Two-Face, Joker and Catwoman. I just had to go back for a remake of Batman. After the first image the style altered a bit and I felt the need to incorporate Batman in that style as well.


10-4 //Niklas

Monday, April 27, 2015

Catwoman

After Batman & Robin, Two-Face and Joker, the turn has come to Catwoman. This is, as far as I can remember, the first time I tried to seriously draw a woman hero/villain. A tough task in retrospect. First, I've done male characters from the Batman universe and I wanted this to have the same feel and style. How can you do that and still make this character feminine? I also really, really. didn't want to fall in the comic-book/video-game cliché trap of making all female characters into a juvenile sex fantasy. I want to be able to show my drawings to my kids. BUT, Catwoman IS originally a very sexual and sexy character, how can I do MY Catwoman without loosing the original one? I think I managed pretty well finally.


Do you like it?

10-4 //Niklas

Wednesday, April 22, 2015

The Joker

Had to continue my Batman fan-art theme. After doing Batman & Robin and Two-Face, it's now time for the Joker to be in the spotlight.

The Joker

You like it? Well, I do.

10-4 //Niklas

Sunday, April 19, 2015

Two-Face

Okay, I felt I needed to keep working on the theme from last post. (Batman and Robin) Felt an urge to add a villain to the collection. So, I give you Harvey Dent AKA Two-Face.

Two-Face


10-4 //Niklas

Friday, April 17, 2015

Batman & Robin

Tonight I spent three hours creating my first fan-art. The good old Batman & Robin. The dynamic duo. Holy cell-shading, Batman!
Batman and Robin fan-art
Batman & Robin fan-art.
+1 and/or comment, darn it!

Update: Process screencast available here:


10-4 //Niklas

Friday, April 10, 2015

Pirates

I painted a corny pirate drawing this week and recorded the process using the excellent (and free) "Open Broadcaster Software". Sped the thing up 64 times and added some music using the not-so-excellent (but free) Windows Movie Maker.

The image was drawn on my Wacom Cintiq Companion 2, using the Krita software (most excellent, dude). I started by doing a quick sketch then on to flat colors and shadows and some outlines. All on the same layer. I did it this way to practice freehand painting. It was tough and rendered me a lot of trial and error, do-and-redo, etc. Part of the outcome was pretty good and some were more like... meh...


Pirates. Resulting image.

Now, for a while I will try to keep to the Lines-Shading-Color-process for practice.

10-4 //Niklas

Saturday, March 21, 2015

Colorful Robot Head-type thing

I have been working on this drawing for some hours and finally, now I believe I'm sufficiently happy with it. At last I've found the right tools in Krita to do shading with.


10-4 //Niklas

Saturday, March 14, 2015

Daughters orders: Paint a castle!

Yesterday evening, my lovely 5½ year old daughter ask me to paint her a picture. When I asked her what she wanted me to paint, she had to think for a while and the she told me to paint a castle. So I started to paint using krita on my Cintiq Companion. She sat there next to me and told me what colors to use (or rather I had to check with her to approve my decisions). All in all we had ourselves a super cozy evening and she was more than happy with the result, especially the moat and the curtains which she was really decisive about. She's awesome!


10-4 //Niklas

Tuesday, March 10, 2015

Inflight sketches

Had to go for a short trip this weekend up to the northern parts of Sweden so I got a chance to do some high altitude training on the Wacom Cintiq Companion 2. The first one I did on the one hour flight up there and the second I did on my way home. They're both messy and really sketchy, but considering on the short time and the rather wobbly character of the small plane I'm still kind of happy with them.
Sketching in progress.

Sketch done on my way up north.

Wobbly airplane.

Sketch made on my way home.
10-4 //Niklas

Sunday, March 1, 2015

Me at the Dental Hygienist office

Had an appointment with the Dental Hygienist this Thursday. Regular checkup type thing. Obviously I hadn't flossed as much as i should. Like paying big bucks to fight a rhino.

dental hygienist cartoon
Me at the Dental Hygienist office...
Did this drawing using Krita and my Wacom Intuos Pro.

10-4 //Niklas

Sunday, February 22, 2015

Tyrannotweettweet Rex

Australia, the country of none but murderous animals.

Tyrannotweettweet Rex - Extremely dangerous bird
Tyrannotweettweet Rex
10-4 //Niklas

Tuesday, February 10, 2015

Trouseless Cartoon

A quick, corny cartoon I did last night. Sorry about the Swedish, though. It really doesn't translate well, it's all cultural. Painted using my Wacom Intuos Pro and Krita software.


10-4 //Niklas

Saturday, February 7, 2015

An assignment: Wired Koala

I haven't been very active lately when it comes to doing my daily sketches. For one thing I haven't had enough time (family, working out, plain working) but the last couple of days it actually depends on the fact that I received an assignment. My first requested job in arts! Wohoo!

A friend of mine saw the "Jumper" image I did, liked it, and asked me to create a character that could work as a logotype and as a "front" for one of his projects. Since I'm such a rookie and an amateur, I told him "Hell yeah! But I can't guarantee either quality or timespan and I really like to use the work and result for my own portfolio.". Deal!

Anyway, he - kind of randomly - have ended up with the wonderful nick "Wired Koala" so he wanted to incorporate that by letting the character be a koala bear, he also liked it to be sort of a super hero thing. And, hey, honestly, you can't go wrong with a super hero koala. I tried to drag out some more info about mood/color scheme/feeling/style but that was pretty much left for me to decide, but not overly stylized as a lot of logotypes tend to be.

So, added my thoughts, these are the requirements:
  • Koala.
  • Super hero themed.
  • Since he liked the Jumper I will do it in a "cartoony", not too realistic, manner. 
  • A real character, not just five lines that "gives you the sense of koala".
  • The project is about connectivity, that and the "Wired" part of the name could and should be incorporated in the character in some way.
Next step, research. Since my experience with koala bears are fairly limited, to say the very least, I needed to get a hang of how they look. Google image search was my friend here. Needless to say, I felt like a five year old girl going "naaaw", "aaaw" each time I scrolled a bit down the results. Damn, those creatures are cute and cuddly looking! Damn them for breaking my facade of infinite machoness!

So, after gathering a few nice reference images, I believe I got a hang of how the litter critter is built and it's, at last, time to grab the pen and tablet and start sketching ideas in Krita. Pretty much from the start I realized I need to go with a semi human style, that would enable me to use a posture and/or movements that will be easily read by anyone. After some messing around I decided to go with a sort of pear-shaped body with short or no visible legs. More or less feet attached to the body. What else? Yeah, clothing. Following a super hero theme I decided to go with a cape and a tight, sleeveless, shirt. Mainly because of the simple shape of it. Further I didn't want to use a cowl because it would probably give the character a less cute and more of a tough style. I rather have it cute and cool instead of rough and tough. So for anonymity the character was given a type of Robin/Ninja Turtle style mask to depend on. I finally ended up with the sketch below where the character is in a cool pose, one hand in the waist and one hand doing the peace sign. To complement that cool feeling I gave it a sort of a smirky looking smile.
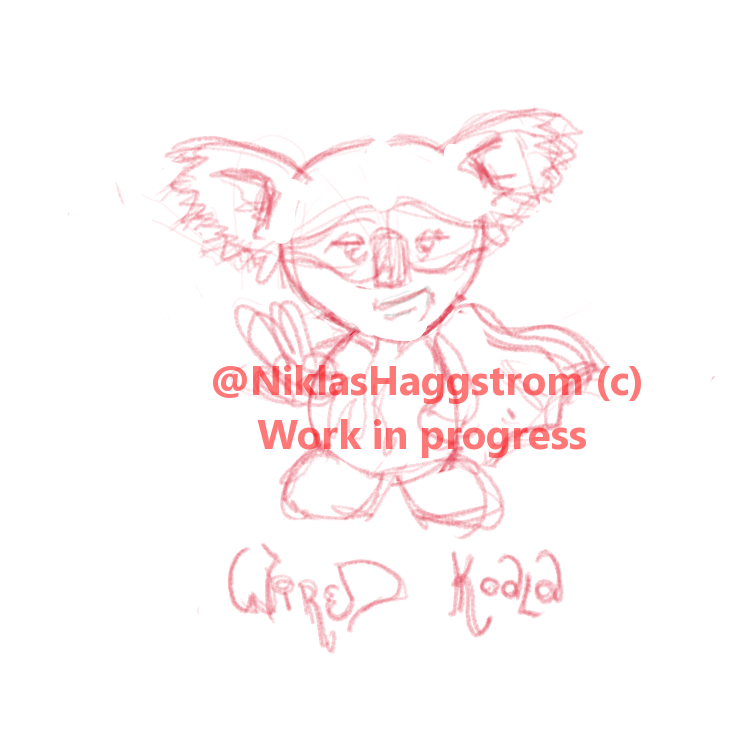
The initial sketch I decided to continue working on.
From the initial sketch it was simply a matter of painting it roughly to give my client an idea and something to discuss around. I gave the koala itself a sort of koalaish gray color, the shirt got to be blue, a color that signals professionalism, and the mask and cape was given a green, calm and non invasive color. I also threw a "super hero logo" in there on the characters chest, in the form of a electric plug. That could illustrate both the "Wired" part of the nick and the connectivity part of my clients project. For a simple backdrop I roughly painted a sort of beige area around the character. This should be enough to give my client an idea of where I'm heading.

Painting the sketch I also realized that the peace/victory sign that I'd drawn in the initial sketch didn't work so well. The koala actually rocks two opposing fingers, instead of just one like we have. The two-thumb-look simply looked strange so I skipped that for now. That'd do for now, so I sent that to the client for feedback, being very clear on the fact that this is very much a FIRST DRAFT. 
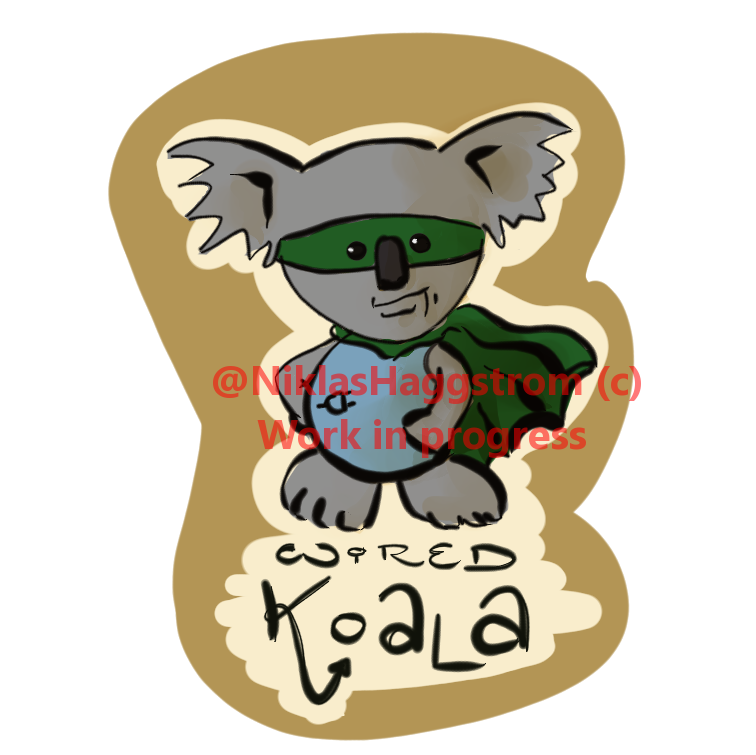
First concept idea sketch.
I actually received nothing but positive feedback from my client. Apparently he understood the concept of "first draft" and was able to ignore the messy paint and get a feel for the relevant stuff such as the idea, the attitude, the style and such. 

Since the idea sketch was a success, there was really no need to change much. One thing he asked me, though, was if it was possible to export drawing into some sort of vector format. This made me think. Since I still haven't really come to a point where I can do super nice lines and clean ink full of life and whatnot I decided to do the lines as vectors in Inkscape first and then, later, colo2r it and add shadows in Krita or Gimp. Or, wait a minute, why not draw it in its full using vectors? That would give me two things: 1) The option to scale the image a lot without loosing quality. 2) The ability to easily modify specific elements in the image. Vectors it is then. All the way. This would be a nice opportunity for me to learn more about drawing vector graphics. Yay! Learning: Good!

So, the evening after the first rough sketch I imported it into Inkscape and started to manually trace the lines and slightly adjusting details. The only thing I actually changed was the feet of the character. I had neglected those in the sketch so they needed a shape-up. I also gave the cape and the mask a lighter color than I had used earlier just to make the character look kinder and more of a "good" super hero. I emphasized the outline with a wider border plus an extra white border to make it pop and also to make the image work without the backdrop on both white, black or colored background.  
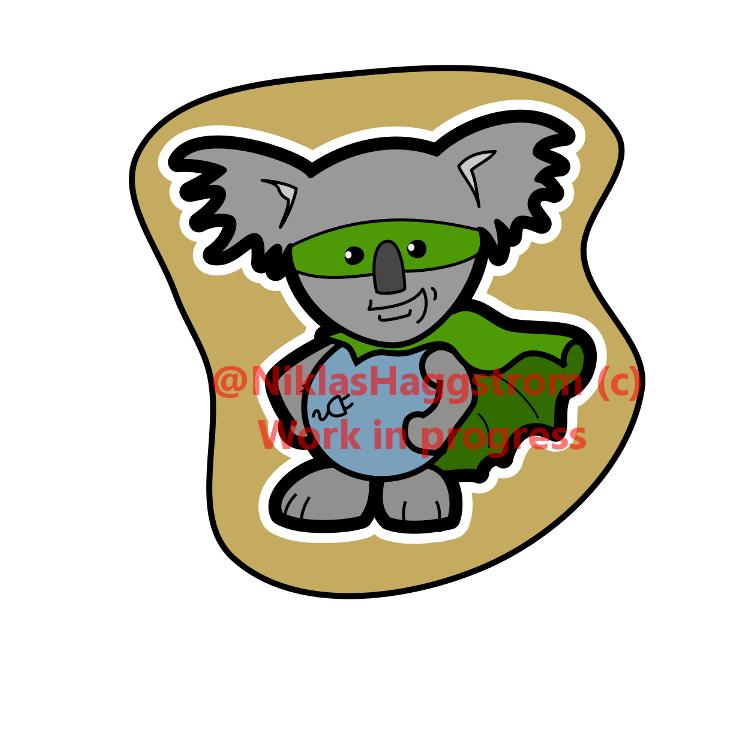
First iteration of the vector image.
The feedback I received after showing my client this first vector version was somewhat overwhelming. He was super happy about the image and almost had it printed on shirts. I managed to cool him down a bit though. Enough to make him let me finish the work. Thanks mate! ;-)

The next evening I focused on shades. I also eliminated all borders in the drawing, turning them into separate shapes, this allowed me to adjust some lines to make them a bit more alive and "realistic". For example the smirk and the lines that indicates the toes. I finally managed to make the right (from the viewers perspective) arm look good too. 
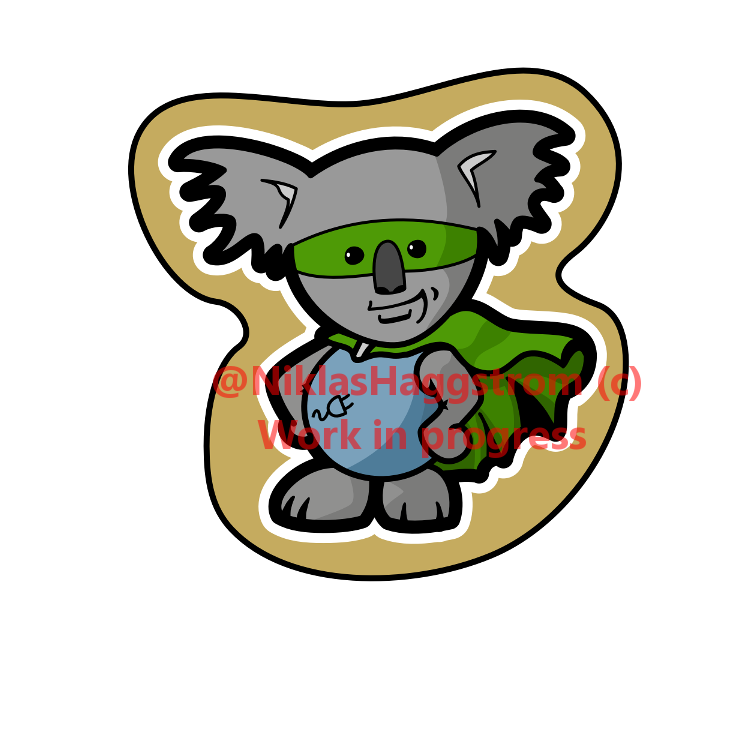
Vector image second iteration?
I gave the image one more evening, tightening up the outlines and making minor adjustments. I also took time to separate some shapes into different layers. That will enable me to hide the shades to just show flat colors or the backdrop or even the body so that my client can use only the head if he'd like to. 
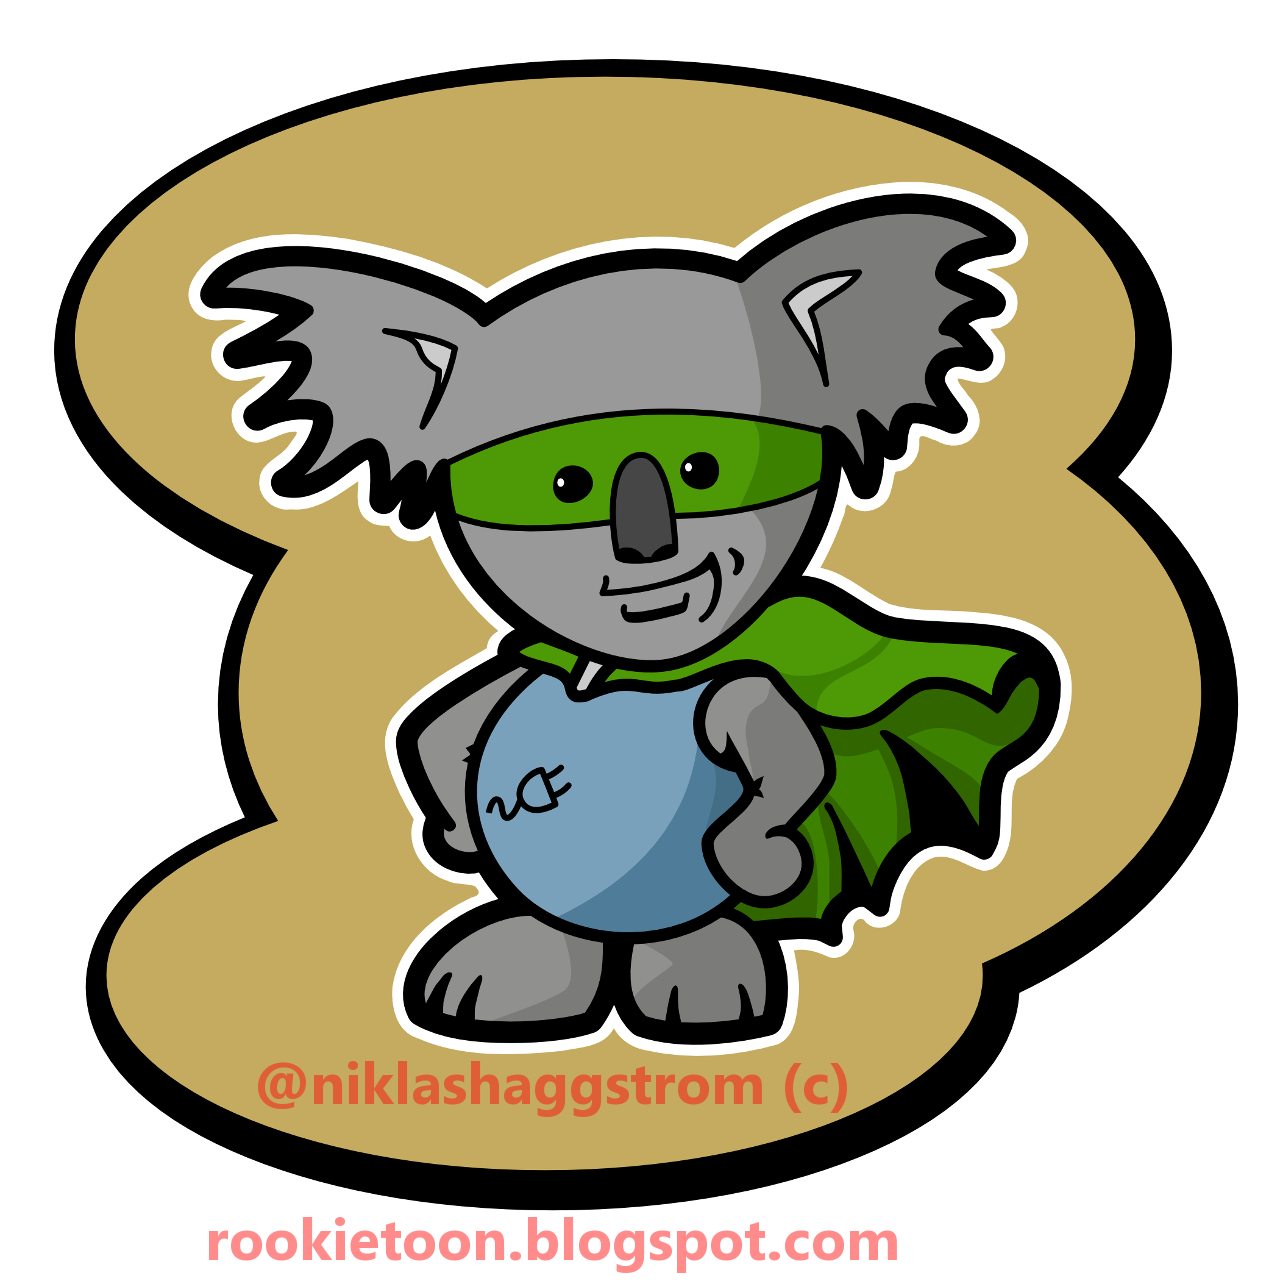
Final version of the image.

So, that's it! The images are sent to my client and, now, even the documentation is done. I am very happy with the result and, for the record, so is my client. 

+1 and/or comment if you liked it or want to drop some critique.

10-4! //Niklas

Friday, January 23, 2015

Book delivery

Oh yeah! I received this kit of goodness today! I don't know how to get the time to finish the batch of comic albums I last bought, read this AND get some drawing done soon, though.

The Jumper Cartoon

I need to practice my freehand drawing skills and also, I'm trying to figure out Krita. So, yesterday evening I sat myself down with my laptop and the Wacom tablet to see if I could do some type of cartoon character drawing. 

While at it I also got the idea to document the process so I managed to download, install and set up Open Broadcaster Software to capture my screen while working. The captured video was edited using Microsoft's Movie Maker and then uploaded to YouTube. My first YouTube video. That's huge! ;-)


The resulting image? Below.


10-4 //Niklas